![]()
添加留言板
- 在菜单栏添加留言板栏
添加一个新的page
执行命令
进入 source/guestbook/index.md。加入你想显示的内容,如:
1
2
3
4
5
6
7
| ---
title: 留言板
date: 2021-05-2 13:34:29
---
# 欢迎来到我的博客!
> 欢迎在这里留言!任何问题都可以在这里留言,博主会及时回复的,添加email可以收到回复提示
|
进入 _config.next.yml,
找到menu栏目,添加留言板功能:
1
2
| menu:
guestbook: /guestbook/ || fa fa-book
|
NEXT8图标支持font awesome,可以按自己喜好修改。
如果有多语言支持需求,可以更改 themes/next/languages 下对应语言的翻译。
zh-CN.yml:
- 重新生成页面即可
1
| hexo clean;hexo g;hexo d
|
文章置顶
由于Next升级到8.22,这部分与next7有一些出入,过更新一下
在博客根目录下安装置顶插件
1
2
3
| cnpm uninstall hexo-generator-index --save
cnpm install hexo-generator-index-pin-top --save
cnpm install hexo-util --save //由于光执行上面的会报错,需额外下载hexo-util
|
在需要置顶的文章头加入top: true
例如
1
2
3
4
5
6
| ---
title: test
date: 2021
categories: 测试
top: true
---
|
然后在文章标题下面添加一个置顶标签样式
打开:/blog/themes/next/layout/_macro themes\hexo-theme-next\layout\_partials\post\post-meta.njk文件,定位到div class=”post-meta”标签下,插入如下代码:
1
2
3
4
5
| {% if post.top %}
<i class="fa fa-thumb-tack"></i>
<font color=7D26CD>置顶</font>
<span class="post-meta-divider">|</span>
{% endif %}
|
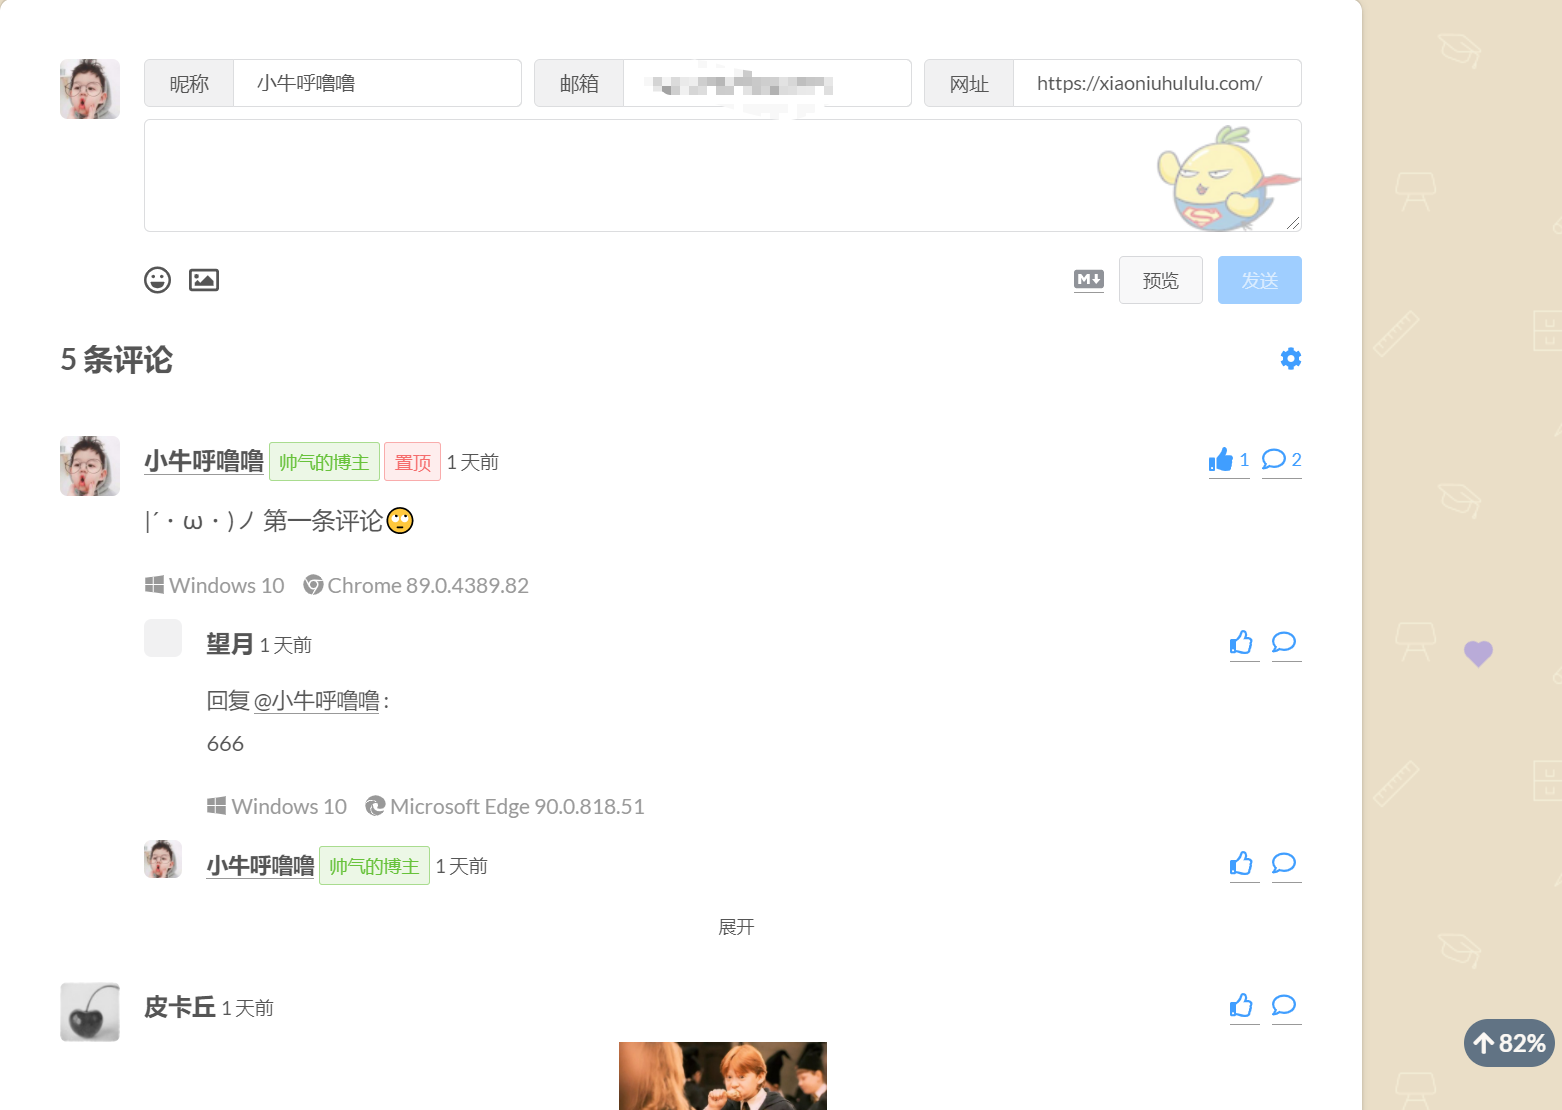
添加 twikoo评论
首先云函数部署
修改配置文件
暂不支持 NexT 8 以下的版本,请先升级到 NexT 8。然后在 Hexo 项目根目录执行 npm install hexo-next-twikoo,然后在配置中添加。为了这个评论,小牛特地将next7升级到next8
1
2
3
4
5
| twikoo:
enable: true
visitor: true
envId: xxxxxxxxxxxxxxx # 腾讯云环境id
# region: ap-guangzhou # 环境地域,默认为 ap-shanghai
|
- 开启管理面板
进入环境-登录授权 (opens new window),点击“自定义登录”右边的“私钥下载”,下载私钥文件
用文本编辑器打开私钥文件,复制全部内容
点击评论窗口的“小齿轮”图标,粘贴私钥文件内容,并设置管理员密码。
里面可以配置邮件回复的通知,等许多自定义的选项。注意的是 你的邮件服务邮箱和你常用的邮箱不要设为一样,不然邮箱无法通知自己(虽然邮箱可以自己发给自己,但twikoo就不行,真是奇怪。)
![]()
目前来看,使用体验还是不错的,但不知道能撑多久~~
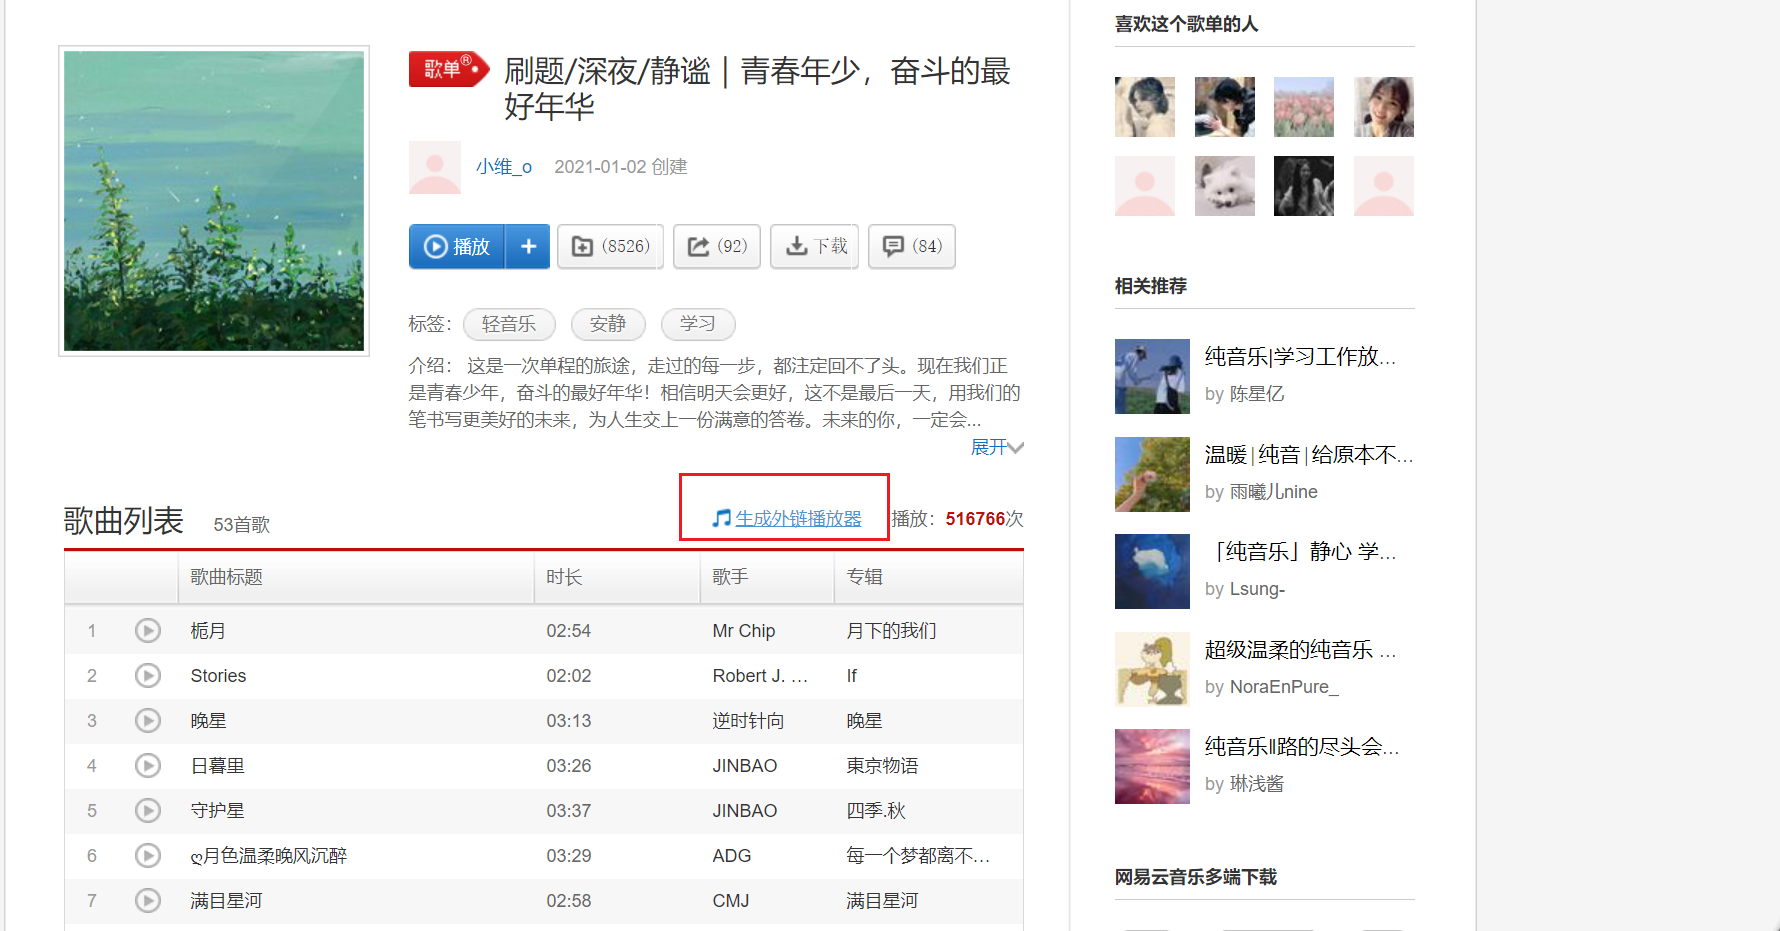
添加网易云 小插件
- 首先登录网易云,找一个的歌单(保证有版权),点击生成外链
![]()
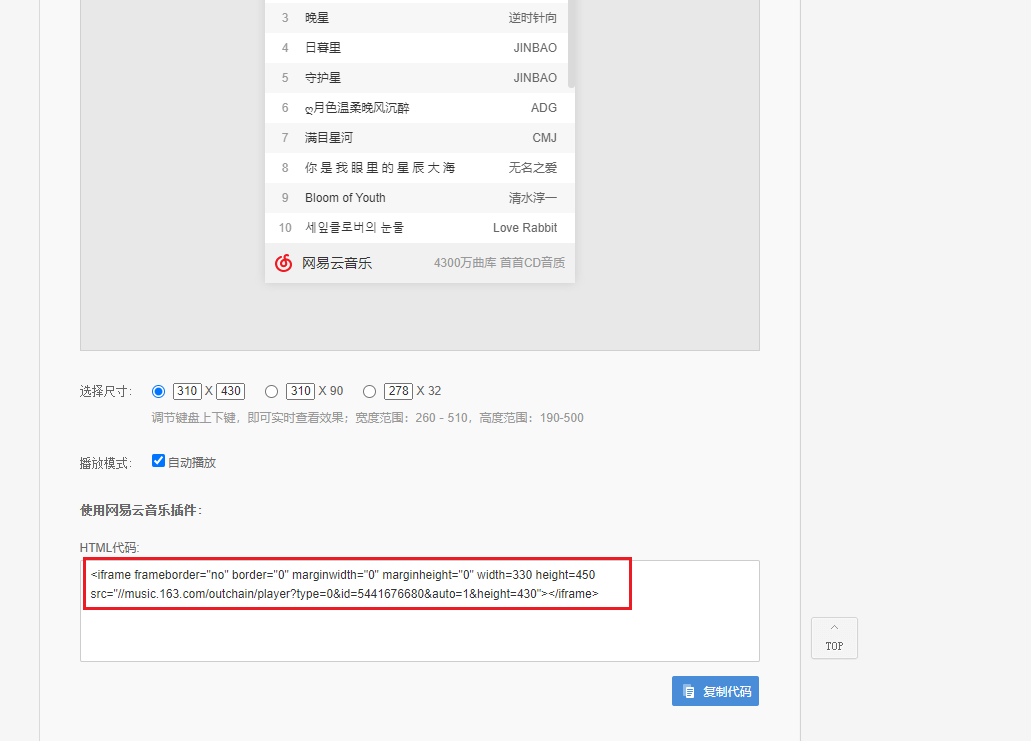
然后复制代码:
![]()
- 将网易云代码添加到Next主题
小牛这部分,采用的是网易云外链播放器插件,并简单的魔改了样式和增加了js动作(可以展开和搜缩播放器)
添加到source_data\head.njk:
1
2
3
4
5
6
7
8
9
10
11
12
13
14
15
16
17
18
19
20
21
22
23
24
25
26
27
28
29
30
31
32
33
34
35
36
37
38
39
40
41
42
43
44
45
| <script type="text/javascript" src="/js/cursor/zjAdd.js"></script>
<div class="musicwyy2" style="position:fixed;left:0px;bottom:0px;z-index:105;opacity: 1;
width: 30px;
height: 110px; font-size: 15px;
font-family: 'Long Cang';">
<button type="button" style="
width: 30px;
height: 90px;
margin-top: 10px;
margin-bottom: 10px;
border-width: 0px;
background: #f5f5f5;
z-index:200;" onclick="musicChange()"> 播放器</button>
</div>
<div class="musicwyy1" style="position:fixed;left:0px;bottom:0px;z-index:100;opacity: 1;
width: 300px;
height: 110px;font-size: 0;">
<div class="aplayer-miniswitcher" style="
height: 110px;
width: 20px;
display: inline-block; overflow: hidden;">
</div>
<div style="
width: calc(100% - 30px);
height: 110px;
display: inline-block;" id="musicZJ">
<iframe id="wyyZj" frameborder="no" border="0" marginwidth="0" marginheight="0" width=280 height=110
src="//music.163.com/outchain/player?type=0&id=6740519472&auto=1&height=90"
></iframe>
</div>
</div>
|
新建文件 themes\hexo-theme-next\source\js\cursor\zjAdd.js(如果路径 不存在,就新建):
1
2
3
4
5
6
7
8
9
10
11
12
13
14
15
16
17
18
19
20
21
| function musicChange() {
// let element = document.querySelector(".jtZj");
// let rotate = document.querySelector(".jtZj-rotate");
// if(rotate == null) {
// element.classList.add("jtZj-rotate");
// }else {
// element.classList.remove("jtZj-rotate");
// }
var box = document.getElementById("musicZJ");
var element = document.querySelector(".musicwyy1");
if(box.style.display == "none") {
box.style.display = "inline-block";
element.style.zIndex = 100;
}else {
box.style.display = "none";
element.style.zIndex = -100;
}
}
|
其中:
把自己的代码 替换下面的部分即可
1
2
3
| <iframe id="wyyZj" frameborder="no" border="0" marginwidth="0" marginheight="0" width=280 height=110
src="//music.163.com/outchain/player?type=0&id=6740519472&auto=1&height=90"
></iframe>
|
最终效果:
![]()
本篇文章到这里就结束啦,如果喜欢的话,多多支持,欢迎关注!